The Best SIM or eSIM Options for Southeast Asia Backpackers
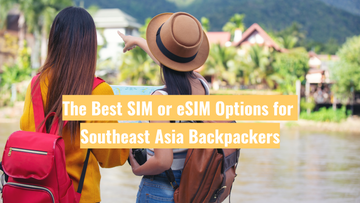
Imagine landing in Bangkok, Ho Chi Minh City or Bali and being instantly connected — no haggling at airport kiosks, no hunting for patchy Wi-Fi, no hassle.
Southeast Asia is incredible for budget travellers, digital nomads and adventure seekers — but choosing the right SIM or eSIM can be confusing when you’re crossing borders, comparing networks or hunting for the best deal.
We will break down the best physical SIM and eSIM options for backpackers exploring Thailand, Vietnam and Indonesia — with real prices, coverage tips and practical travel advice. Stay connected, share your adventures, and keep your bookings sorted without overspending.
Countries Covered
- Thailand
- Vietnam
- Indonesia (Bali and beyond)
Bonus: Many of these tips apply to Cambodia, Malaysia and Laos too.
Physical SIM vs eSIM: Pros & Cons
Physical SIM
- Cheap and easy to find in cities.
- Great if you’re staying in one country for an extended period.
- Downside: you need to find a shop, swap out your SIM card, and risk losing your home SIM.
eSIM
- Buy your eSIM online before you travel — from Global Starlink or other trusted providers.
- Instant activation lets you download your eSIM straight to your phone and start using it immediately.
- Most phones let you store multiple eSIM plans, so you can switch between country-specific plans or use one that covers several countries without swapping SIM cards.
- Make sure your phone supports eSIM (most newer models do).
Thailand: Best SIM & eSIM for Backpackers
Top Local Providers:
- AIS — the best rural coverage and reliable speeds, even on remote islands.
- DTAC (now merged with True) — easy tourist packages and good city coverage.
- TrueMove H — budget-friendly plans for city travel.
Where to Buy:
- Airport kiosks: convenient but usually more expensive.
- 7-Eleven: cheaper and you’ll find them everywhere.
- eSIM: Activate instantly before you fly — no need to queue at kiosks.
Average Costs (2024):
30-day unlimited physical SIM: approximately 300–500 THB (~$8–$14 AUD).
eSIM: ~$10–$15 AUD for 10–15GB.
Tip: Some hostels sell SIMs at a markup. Buy direct from a 7-Eleven or set up your eSIM beforehand for the best value.
Vietnam: Best SIM & eSIM for Travellers
Top Local Providers:
- Viettel — the best coverage, especially for rural trips like the Ha Giang Loop.
- Vinaphone — fast speeds in major cities.
- Mobifone — cheaper but weaker coverage outside urban areas.
Where to Buy:
- Airport counters or official stores — remember your passport.
- Local shops — good deals, but ensure they activate and register your SIM properly.
- eSIM: With Global Starlink, you can connect before you land.
Average Costs (2024):
30-day unlimited physical SIM: approximately 200,000–300,000 VND (~$8–$12 AUD).
eSIM: ~$12–$15 AUD for 10–15GB.
Tip: Street sellers sometimes skip the registration step — if your SIM isn’t registered to your passport, it could be deactivated. Stick with official stores for peace of mind.
Indonesia: Best SIM & eSIM for Digital Nomads
Top Local Providers:
- Telkomsel — the strongest coverage nationwide, ideal for remote areas like Raja Ampat.
- XL Axiata — good value for city travel and island hopping.
- Indosat Ooredoo — decent in cities, less reliable off the beaten track.
Where to Buy:
- Official stores at airports — convenient but more expensive.
- Local phone shops — cheaper, but be cautious of expired SIMs.
- eSIM: Download and activate your plan before you leave home.
Average Costs (2024):
30-day unlimited physical SIM: approximately 150,000–250,000 IDR (~$10–$16 AUD).
eSIM: ~$12–$16 AUD for 10–15GB.
Tip: If you plan to visit remote islands, Telkomsel is essential. For a smooth experience, use an official Telkomsel Grapari store for physical SIMs — or stay hassle-free with a Global Starlink eSIM.
Quick Comparison Table
| Country | Best Local SIMs | Approx. Cost (Physical SIM) | Global Starlink eSIM | Top Tip |
|---|---|---|---|---|
| Thailand | AIS, DTAC, TrueMove | $8–$14 AUD | $10–$15 AUD for 10–15GB | 7-Eleven is cheaper than the airport |
| Vietnam | Viettel, Vinaphone, Mobifone | $8–$12 AUD | $12–$15 AUD for 10–15GB | Always register your SIM properly |
| Indonesia | Telkomsel, XL Axiata, Indosat | $10–$16 AUD | $12–$16 AUD for 10–15GB | Telkomsel is best for remote islands |
Practical Backpacker Tips
- Always carry your passport when buying a physical SIM — it’s needed for registration in most countries.
- Use dual SIM mode if your phone allows it — keep your home SIM safe and run a local eSIM alongside.
- Top up online if possible — this avoids language barriers and dodgy top-up cards.
- Be cautious of “tourist SIMs” with hidden fees — always read the fine print.
- Check your phone’s eSIM compatibility before you fly.
Wrap Up: What’s Best for You?
On a tight budget and staying put? A local SIM might be your cheapest option.
Travelling across borders or hate the hassle of swapping SIMs? A Global Starlink eSIM is your best solution — simple, instant and flexible.
Visiting remote areas or rural regions? Choose strong local coverage — AIS, Viettel and Telkomsel are the best picks.
Ready to Go?
Wherever you’re headed, a good SIM or eSIM means you’ll have maps, bookings and your travel plans ready when you need them.
Get your travel eSIM from Global Starlink before you fly — arrive connected and get exploring the moment you say “Sawasdee”, “Xin chào” or “Halo”.
Safe travels and happy backpacking!


